Every production-ready application needs a reliable place to store media files, user uploads, and backups. Following up on our previous guide where we provisioned an AWS RDS MySQL database, the next logical step in scaling our cloud setup is adding a dedicated object storage layer.
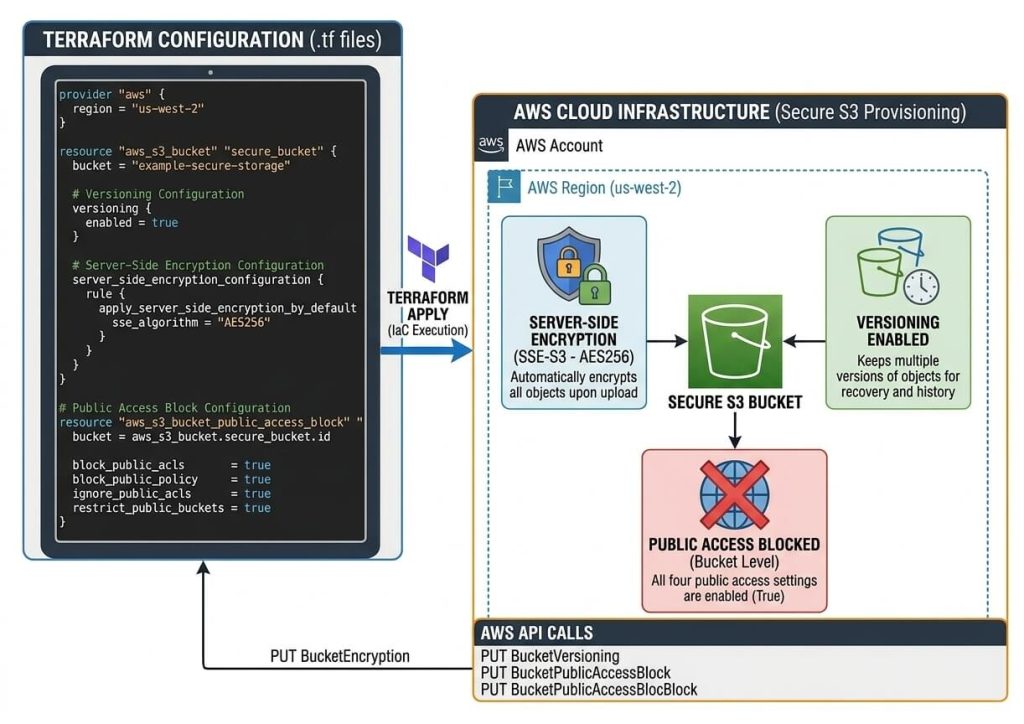
In this tutorial, we will write clean, production-ready Terraform code to deploy an AWS Simple Storage Service (S3) bucket—configured from day one with strict public access blocks, automated server-side encryption, and version control.
Why AWS S3 and Infrastructure as Code?
AWS S3 is the industry standard for scalable object storage, but misconfigurations remain one of the most common security pitfalls in cloud environments. Managing buckets manually through the console often leads to missed safety controls or drift between environments.
By defining our S3 resources using Terraform, we enforce security guardrails automatically. Here is what we will configure:
Block Public Access: Completely isolates your bucket from the public internet to prevent unintended data exposure.
Server-Side Encryption (SSE-S3): Automatically encrypts every uploaded object at rest using AES-256.
Bucket Versioning: Keeps track of object variations, allowing you to recover files from accidental deletions or overrides.
Terraform S3 Bucket Configuration
Below is the complete, production-ready Terraform code to create a secure AWS S3 bucket with all security policies enabled.
Execute the following Terraform commands to initialize and deploy the secure S3 bucket:
Initialize the directory and providers:
terraform init
Validate the configuration:
terraform validate
Preview planned resources:
terraform plan
Deploy resources to AWS:
terraform apply -auto-approve
Deployment Verification
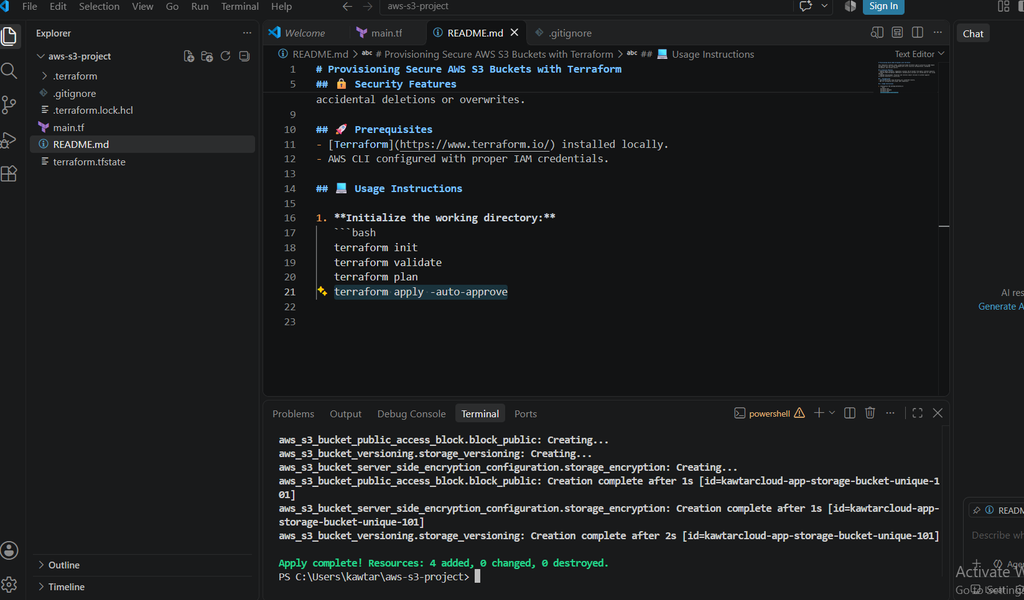
Once the deployment completes, the terminal output confirms that Terraform successfully created all four resources—the S3 bucket, versioning, server-side encryption, and the public access block—with zero errors:
As shown above, Apply complete! Resources: 4 addedindicates that your S3 bucket is now fully provisioned on AWS with all security guardrails active.
CONCLUSION
By managing your AWS S3 buckets through Infrastructure as Code with Terraform, you ensure that security standards—such as encryption, versioning, and public access blocks—are consistently enforced across your infrastructure rather than left to manual configuration.
You can find the complete, production-ready code used in this guide in my GitHub repository. For more advanced configuration parameters and lifecycle rules, feel free to explore the official Terraform AWS Provider documentation.