
Introduction
When designing a production-ready, multi-tier architecture on AWS, securing the backend layer is non-negotiable. Exposing a database to the open internet is one of the most common configuration risks.
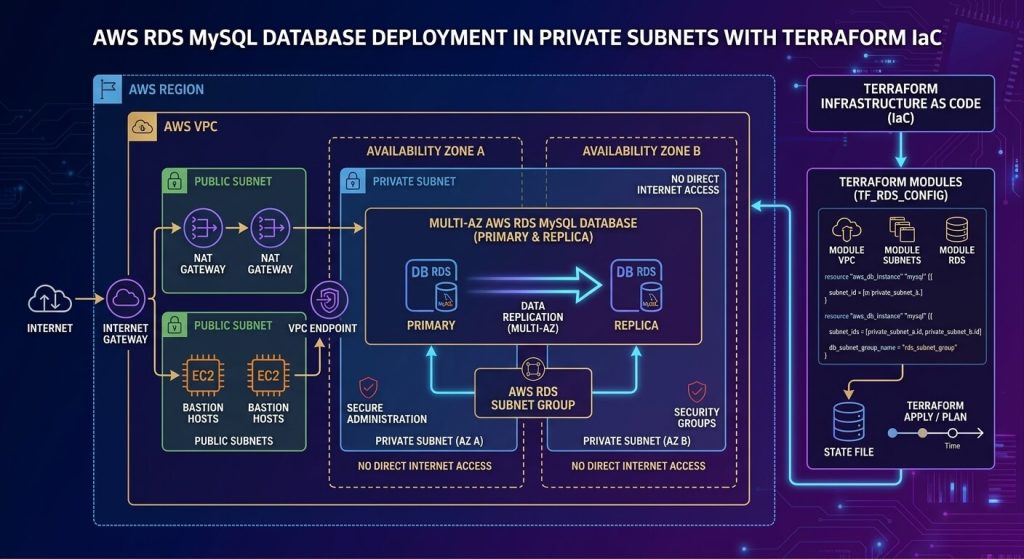
Building upon our previous guide on setting up EC2 instances within a custom AWS VPC, this hands-on tutorial focuses on isolating the database tier. We will write clean, modular Terraform code to provision a fully automated and secure AWS RDS MySQL instance inside private subnets.
WHY USE AWS RDS AND PRIVATE SUBNETS?
Placing a database directly in a public subnet leaves it exposed to internet-borne threats, automated scans, and unauthorized access. By deploying AWS Relational Database Service (RDS) inside isolated Private Subnets, you establish a solid defense-in-depth model:
- Enhanced Security: The database receives no public IP address, making it completely invisible and inaccessible from the outside internet. Access is strictly confined to application servers within the VPC via dedicated Security Groups.
- Automated Maintenance: AWS handles time-consuming administrative tasks like automated backups, software patching, high availability failover, and hardware scaling effortlessly.
- Controlled Access: Network traffic is tightly filtered, ensuring only authorized resources can initiate database connections.
PREREQUISITES
Before diving into the code, make sure you have the following setup ready:
- An Active AWS Account: Access to the AWS Management Console with permissions to create VPC and RDS resources.
- AWS CLI Installed & Configured: Configured locally with your security credentials (
aws configure). - Terraform Installed: Version 1.0 or higher installed on your local machine.
- Existing Custom VPC (Optional): Basic understanding of AWS networking concepts like Subnets and Security Groups.
Step-by-Step Terraform Configuration
1. Base Infrastructure Configuration (main.tf)
Before provisioning the database, we need to create the underlying network components—the VPC, two private subnets across different Availability Zones, and the security group:
provider "aws" {
  region = "us-east-1"
}

# 1. Create VPC
resource "aws_vpc" "main" {
  cidr_block           = "10.0.0.0/16"
  enable_dns_hostnames = true

  tags = {
    Name = "main-vpc"
  }
}

# 2. Create Private Subnets
resource "aws_subnet" "private_1" {
  vpc_id            = aws_vpc.main.id
  cidr_block        = "10.0.1.0/24"
  availability_zone = "us-east-1a"

  tags = {
    Name = "private-subnet-1"
  }
}

resource "aws_subnet" "private_2" {
  vpc_id            = aws_vpc.main.id
  cidr_block        = "10.0.2.0/24"
  availability_zone = "us-east-1b"

  tags = {
    Name = "private-subnet-2"
  }
}

# 3. Create Security Group for RDS
resource "aws_security_group" "db_sg" {
  name        = "rds-db-sg"
  description = "Allow inbound traffic for database"
  vpc_id      = aws_vpc.main.id

  ingress {
    from_port   = 3306
    to_port     = 3306
    protocol    = "tcp"
    cidr_blocks = ["10.0.0.0/16"]
  }

  egress {
    from_port   = 0
    to_port     = 0
    protocol    = "-1"
    cidr_blocks = ["0.0.0.0/0"]
  }

  tags = {
    Name = "rds-security-group"
  }
}
2. Defining the DB Subnet Group (rds.tf)
RDS requires a DB Subnet Group to know which subnets it is allowed to deploy within across multiple Availability Zones:
resource "aws_db_subnet_group" "main" {
name = "main-db-subnet-group"
subnet_ids = [aws_subnet.private_1.id, aws_subnet.private_2.id]
tags = {
Name = "My DB Subnet Group"
}
}3. Creating the MySQL RDS Instance
Next, we define the aws_db_instance resource with secure configurations, storage parameters, and credentials management:
resource "aws_db_instance" "mysql" {
identifier = "my-rds-mysql-instance"
allocated_storage = 20
max_allocated_storage = 100
engine = "mysql"
engine_version = "8.0"
instance_class = "db.t3.micro"
db_name = "appdb"
username = "adminuser"
password = "SecurePassword123!" # In production, use AWS Secrets Manager
parameter_group_name = "default.mysql8.0"
db_subnet_group_name = aws_db_subnet_group.main.name
vpc_security_group_ids = [aws_security_group.db_sg.id]
skip_final_snapshot = true
tags = {
Name = "Production MySQL Database"
}
}DEPLOYMENT STEPS
Now that our main.tf and rds.tf files are ready, follow these standard Terraform execution steps to provision the architecture:
1. Initialize Terraform
Run terraform init in your terminal to initialize the working directory and download the required AWS provider plugins:
terraform init2. Preview the Execution Plan
Before creating any cloud resources, run terraform plan to verify the execution path and configuration details
terraform plan3. Deploy the Infrastructure
Apply the configuration to provision the VPC, Private Subnets, Security Group, and the MySQL RDS instance on AWS:
terraform applyType yes when prompted to confirm the deployment.
Confirming the Deployment
After typing yes to confirm the execution plan, Terraform provisions all required resources in real time. Once finished, you will see a confirmation message in the VS Code terminal detailing the total number of resources added, modified, or destroyed.
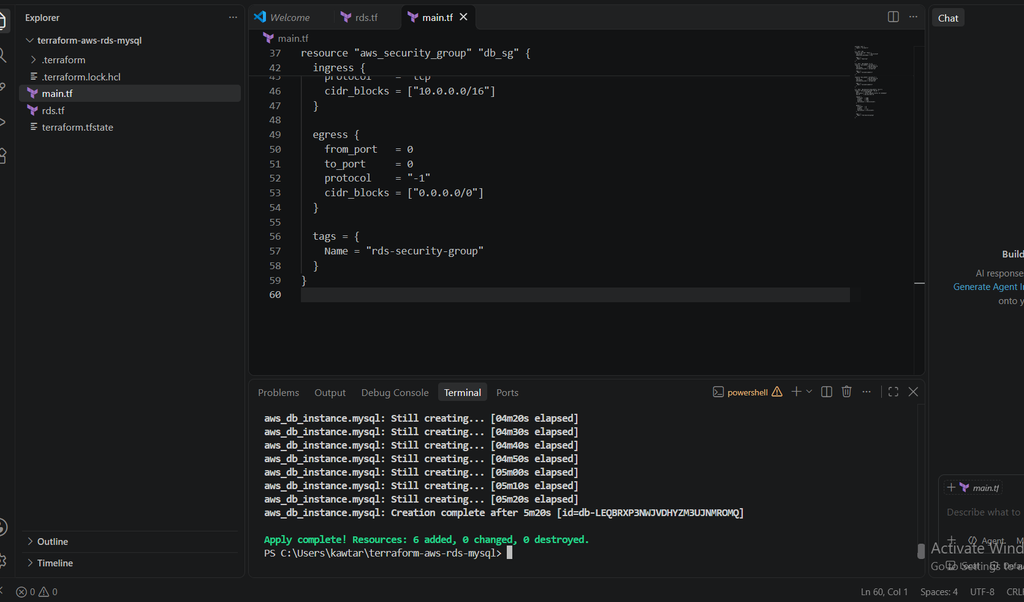
Terminal output in VS Code verifying the successful creation of AWS network infrastructure and RDS MySQL instance.
Conclusion
Deploying a relational database into private subnets is one of the foundational best practices for securing production workloads in the cloud. By leveraging Infrastructure as Code (IaC) with Terraform, we moved away from error-prone manual configurations to a completely repeatable, version-controlled architecture.
Throughout this guide, we successfully isolated an AWS RDS MySQL instance, created a dedicated Security Group to restrict access, and managed subnet routing across multiple Availability Zones to ensure high availability.
Get the Complete Source Code
You can find the entire Terraform project, including main.tf, rds.tf, and configuration files, ready to clone in my GitHub repository:
If you found this hands-on guide helpful, feel free to star the repo or leave your thoughts and questions in the comments below!